Discover for yourself how easy & enjoyable painting can be !
..... as you come exploring ART materials and ART techniques with me.
31 May 2010
"Welcome to My Garden" DVD case
"Welcome to My Garden" is back on the drawing board (well, the editing computer actually).
The series is now undergoing some minor alterations with some new improved software .
Although this means the production is going to take a little longer, the resulting workshop will be even more user friendly, making the learning process that much more enjoyable.
Here is a preview of what the DVD case will look like.
23 May 2010
First the GOOD NEWS - My first DVD "Welcome to My Garden " is now complete. All the editing is finished. The workshop contains 4 complete step-by-step demonstrations. Each lesson is explained in great detail with obvious "page markers" at the end of each step so that when you are following along at home you will know when to pause the dvd and complete the step. I have simplified each step as much as possible to make the lessons easy enough for complete beginners and children to follow.
.....but.....
Once again I have run into some technical difficulties. The full 4 lesson workshop ended up being over 3 hours and my computer seems to be having trouble coping with it. Nevertheless.....IT WILL BE PUBLISHED....I'm just not sure how long it will take.
The sponge roses will have to go onto a separate dvd.
11 May 2010
"Welcome to My Garden" is in the finishing stages now. The paintings are all done and I'm on to the final editing and voice overs. Hopefully only another week if there are no more technical difficulties.
The dvd will feature 2 acrylic gardenscapes, 1 watercolour lesson and 1 soft pastel lesson, all complete step-by-step demonstrations And depending on the final length, I may tag on the sponge rose painting demonstration.
All using just the primaries and white ( except for the pastel I also used a black pastel pencil).
06 May 2010
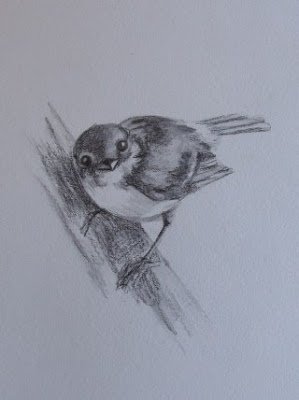
SIMPLE DRAWING STEPS FOR EASTERN YELLOW ROBIN
Transfer your outline drawing to the watercolour paper by tracing onto tracing paper then rubbing the back of the image with the water-soluble graphite pencil. Place the template, graphite side down, in position on the watercolour paper and draw over the image with a biro or stylus. Keep a light touch so as not to engrave the image into the paper.
Using a 4B and 2B water-soluble graphite pencil , shade the darkest areas. The colour spreads once it is wet and can be quite strong so I prefer to start cautiously. Although the graphite CAN still be erased after it has been wet it is still easier to darken than to lighten.
Using a wet no 8 sable round brush blend the graphite. Always consider the direction of the feathers and the shading with your brushstrokes.
 Let the piece completely dry then reinforce the darkest areas with the water-soluble graphite pencil. If any areas are too dark they can be lightened with a normal graphite eraser. Alternatively they can be wetted and lifted out with a tissue.
 Ensure that the paper is DRY before using an eraser or you will damage it .
Blend again with your damp paintbrush. Highlights can be lifted out with a normal pencil eraser as I have done around the eyes and along the leg. Graphite can be erased from anywhere that you feel your picture has become too dark.
Finally, add the yellow. Keep some variation in the tone. I have used cadmium yellow watercolour here, but watercolour pencil, soft pastel or coloured pencil would be just as effective. Watercolour cannot be removed with the eraser but can be lightened if necessary by rewetting and lifting out with a tissue.
05 May 2010
BIRD BATH watercolour 2nd image
.JPG) Filmed the painting of this watercolour image today for the dvd "Welcome to My Garden" Not sure yet if this will be the final image or not. Watercolours dry lighter so you are not sure of the exact colour while it is still wet. Now that I study it I feel the statue needs more contrast in it's shading. Oh well there is always tomorrow.
Filmed the painting of this watercolour image today for the dvd "Welcome to My Garden" Not sure yet if this will be the final image or not. Watercolours dry lighter so you are not sure of the exact colour while it is still wet. Now that I study it I feel the statue needs more contrast in it's shading. Oh well there is always tomorrow.
Subscribe to:
Posts (Atom)
Hi there

- Kim Leanne
- Gympie, QLD, Australia
- I love to paint and draw and I often teach to share my passion with others. Currently I am focussing on producing some step-by-step painting lesson dvds.


