


Subscribe to ART ADVENTURES with Kim Leanne

 Posts
All Comments
Posts
All Comments
Showing posts with label Country morning. Show all posts
Showing posts with label Country morning. Show all posts
03 February 2011
COUNTRY MORNING final step - adding the tail


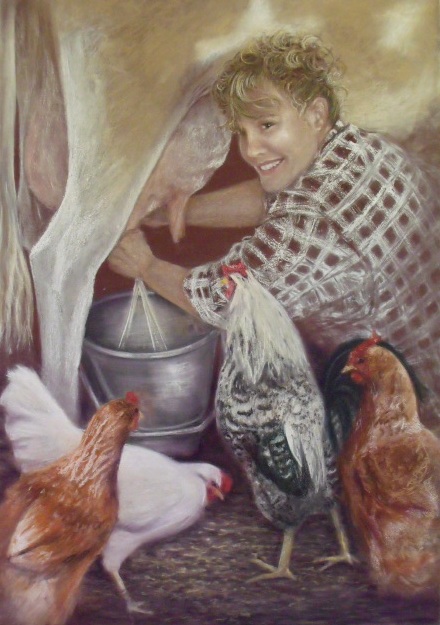
COUNTRY MORNING polish the bucket and add a 3rd hen

The bucket also was in need of a polish if it was to appear clean enough to receive milk. A handle and reflections were added.
The shirt extension was softened with a eraser to blur it into the background.
A simple lighting and shadow effect on the ground helps to maintain the central focus.
02 February 2011
COUNTRY MORNING hen detail

Although the hens are very much in the foreground, and so quite large, their details have been kept fairly vague so as to not draw undue attention. They are not main characters but simply support props to set the scene.
With the addition of the hens I decided that the shirt needed to be extended to the other side of the picture to maintain balance.

01 February 2011
COUNTRY MORNING blocking in the hens

Back in my photo library I found a photo of 3 hens that was just right for the job.
It took a couple of attempts to get the positioning just right. My first position I decided was too close to the rooster so I erased them and moved them back a pace. ( you will notice the patch of chest missing on the rooster )
That is the beauty of working on quality paper - if you are not happy you can erase and rework at any time.
31 January 2011
COUNTRY MORNING refining the likness

COUNTRY MORNING blending rooster adding hair and face details

Then I returned my attention to the face and hair. Skin tones were built up to form the contours of the face. Highlights were added to the hair to indicated waves and curls.
Details were added to the udder. The back section was kept fairly plain, the closer to the face, the more detail and sharpness.
30 January 2011
COUNTRY MORNING add the rooster

28 January 2011
COUNTRY MORNING adding the bucket

26 January 2011
COUNTRY MORNING adding the cow
 The cow and arms are blocked in and then finger blended into the paper, paying attention to the direction of hair growth. At this point I became unhappy with the progress of the portraits likeness. I knew the features were located accurately as they had been measured with the grid but I was not happy with the light and shading contours. These details are equally important to the location of yes, nose and mouth if a true likeness is to be achieved.
 Rather than trying to continue to build up layers of pastel, I chose to remove most of the top layers on the face with a dry paintbrush. This left me with an underlying fleshtone on which I could start afresh. I decided to leave the face alone for a bit while I focus on adding in some of the other details of the picture.
25 January 2011
COUNTRY MORNING starting the face
 Using a variety of flesh tones the lights and darks of the face are blocked in. The colours are then blended with fingers working around the contours and features. The eyes and mouth details are added and more flesh colours gradually built up. For the shadows and creases around the eyes, mouth, ears and jawline an eraser is used gently to reveal undertones of the paper. Next some dark and midtones are blocked in and blended for the hair.
24 January 2011

23 January 2011
Country Morning Portrait reference photos
 This week we will look at painting a portrait story. The main focus will be on the face with just enough background detail to convey some personality and suggest a bit of a story. Step one is to choose, crop and assemble some reference photos. Milking time is always a bit of a community event at our place, with the foster calf waiting for her share of the milk and the free range chooks scouting about for dropped any grain. Even though I am working in a wide open space it can feel quite cramped when everyone wants to get in on the action.
Subscribe to:
Posts (Atom)
Hi there

- Kim Leanne
- Gympie, QLD, Australia
- I love to paint and draw and I often teach to share my passion with others. Currently I am focussing on producing some step-by-step painting lesson dvds.