Discover for yourself how easy & enjoyable painting can be !

..... as you come exploring ART materials and ART techniques with me.


15 December 2011

SPECIAL CHRISTMAS HOLIDAY ART LESSONS

SPECIAL CHRISTMAS HOLIDAY ART LESSONS
                             MONDAY         19th December
                             TUESDAY        20th December
                             WEDNESDAY  21st December
                             THURSDAY     22nd December
                              FRIDAY            23rd December
10.30 am - 11.30 am
$15 per class or
$60 for the week (paid in advance)
suit ages 8 and over
ALL MATERIALS SUPPLIED
KIM LEANNE'S ART
31 MARY ST GYMPIE
book 5483 9866

FROSTY THE SNOWMAN

LEARN TO PAINT
A SNOWMAN
MONDAY 19th December
10.30am - 11.30 am
Kim Leanne's ART
31 Mary St Gympie

CHRISTMAS TREE

LEARN TO PAINT A CHRISTMAS TREE
TUESDAY 20th December
10.30am - 1130 am
Kim Leanne's ART
31 Mary St Gympie

CHRISTMAS CANDLE

LEARN TO PAINT A CHRISTMAS CANDLE

WEDNESDAY
 21st December
1030am - 1130 am
Kim Leanne's ART
31 Mary St GYMPIE

SANTA

LEARN TO PAINT THIS PICTURE
THURSDAY 22nd December 10.30 am
Kim Leanne's ART
31 Mary St GYMPIE

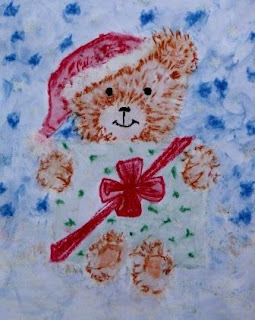
CHRISTMAS TEDDY

PAINT THIS PICTURE
FRIDAY 23rd December 10.30am
Kim Leanne's ART
31 Mary St GYMPIE

10 December 2011

1st PLACE "GOLDRUSH COLOURING COMPETITION"

AMY DAVIS won 1st PRIZE in
Kim Leanne's Goldrush Colouring Competition
8"x10" Canvas 4 Paintbrushes & 12 Set Acrylic Paint

2nd PLACE "GOLDRUSH COLOURING COMPETITION"

RUBY won 2nd PRIZE in
Kim Leanne's Goldrush Colouring Competition
A4 Visual Art Diary & 12 Set of Soft Pastels

3rd PLACE "GOLDRUSH COLOURING COMPETITION"

Phillip Kahler won 3rd PRIZE in the
Kim Leanne's Goldrush Colouring Competition
A5 Visual Art Diary & Set of 6 Soft Pastels

25 November 2011

HELICONIA in pastel

My Pastel Heliconia is featured in this months
AUSTRALIAN FINE ART &DECORATIVE PAINTING
magazine Vol 19 No5 available in your newsagent now
as a step-by-step project.
The picture above was painted from the reference photo in the magazine.
Published alongside the project are step-by-step photos of a plein air study I painted of the same flower.

23 November 2011

colouring competition

Here is a copy of the Goldrush Colouring Competition for you to print out if you missed out at the Goldrush Parade.
Get colouring kids ........ competition closes 30th November 2011.......cut off age is 12 years old .......there will be a surprise gift for everyone who enters.

20 September 2011

Sunrise


Some days it really pays to take the camera with you on your early morning walk.
.....these photos will be a useful reference next time I get the urge to paint a sunrise...

09 September 2011

PASTEL WATERLILY

    Welcome Spring with a Pastel Flower Project   

featured as a step-by-step lesson demonstration in
AUSTRALIAN DECORATIVE PAINTING & FINE ART
magazine Vol 19 No 2 available in your newsagent September 2011

29 July 2011

MR MAJESTIC

STEP-BY-STEP
 instructions for my darling little rooster in soft pastel.
AUSTRALIAN FINE ART & DECORATIVE PAINTING
Vol 19 No 1 available in your newsagents August 2011

12 July 2011

MARY STREET REVIVAL

http://www.facebook.com/pages/Mary-St-Revival/202048073174647
Not a lot of activity on this blog lately.
 My spare energy is being directed into gathering ideas and motivated people with the focus of reviving the main street of Gympie. Check out the Mary Street Revival page and get involved.


10 July 2011

30 June 2011

BOYS AT THE CREEK

BOYS AT THE CREEK
was painted with Winsor & Newton Acrylic on a canvas board 11"x14"
The background was executed entirely with a painting knife 
 the boys were then added with a brush.

29 June 2011

SPLASH !

SPLASH !
was executed with Winsor & Newton Acrylic using only Burnt Sienna, Pthalo Green and Titanium White. I did introduce a touch of ultramarine blue into the water about half way through the job, but that was mostly covered with more pthalo green.


09 June 2011

IMPRESSION SUNRISE

Recently I decided to trial a new Artists' Acrylic manufactured by Winsor & Newton.
"IMPRESSION SUNRISE" is the result of my 1st dabble with these new paints.
Hailed to be the most scientifically advanced acrylic colour available offering a revolutionary and unique advancement in acrylic paint manufacture.
Features include:
    • Virtually No Colour Shift from Wet to Dry
    • New Transparent Binder for Exceptional Colour Brilliance
    • Unparalleled percentage of Single Pigment Colours
    • Outstanding Richness, Intensity & Depth of Colour
Well I can honestly say it is a pleasure to paint with. Lately I have favoured working with oils and pastels for the main reason that I have been doing work which required a lot of blending. These new acrylics have an extended open time and a lovely smooth texture making them ideal for blending.

If your would like an acrylic that feels more like an oil I would recommend you give them a try.

(By the way, I am not being paid to say all this)  ....but hey.... if anyone from Winsor & Newton happens to read this blog post  ...  let it be known ... I am available for promotions... ;o)


02 June 2011

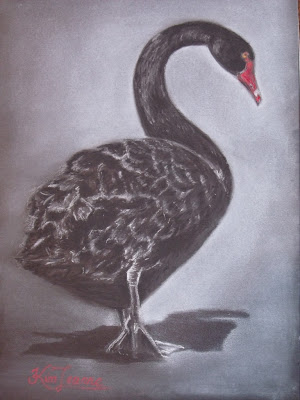
Black Swan

I love black paper!
This swan was painted (drawn if you prefer) from a snapshot taken at the Gympie Duck ponds. The photo was pretty ordinary, but once the background was eliminated I think it made quite a nice little portrait. All it took was a black & white pastel pencil a couple of reds for the beak, browns for the eye and an extra pale blue soft pastel for the background.

23 May 2011

Pastel Poppett

This month  (Vol 18 No 11)
 "AUSTRALIAN FINE ART & DECORATIVE PAINTING"
magazine  features a step by step guide for this cute little puppy portrait. The entire picture was created with just a black, white & brown pastel pencil and a stick of white soft pastel.

08 May 2011

PASTEL PALOMINO PORTRAIT FINE ART MAGAZINE FEATURE

This months issue (Vol 18 No 10) of
AUSTRALIAN FINE ART AND DECORATIVE PAINTING
 features a  comprehensive step by step project guide,
 which shows all the materials I used
and process I followed to complete this 
Pastel Palomino Portrait.

11 April 2011

RAINBOW COMMOTION

Life has been busy lately with setting up the ART4EVA network and meeting some magazine commission deadlines.
Rainbow Commotion was recently featured in Artist's Palette magazine issue 96 as a demonstration article.
It is available in the newsagents this month. Grab a copy if you would like to see the development of, and inspirations behind this painting.
Over the coming months I should have some pastel lessons published in Fine Art and Decorative painting magazine. Next month will be a step by step Palomino Portrait.
The ART4EVA gallery now contains over 70 artworks from a variety of different artists.
To view the current artwork click here.

09 March 2011

NEW ARTIST NETWORK ART4EVA

  *   ATTENTION ALL LOVERS OF ART    *

Do you have some artwork you would like to share on the web?

Would you like to share your art, ideas and inspirations with other likeminded people?
 Would you like to have your work critiqued or critique the work of others?

Would you like to have your very own free ART web page and blogspace?

If you answer YES to any of these questions then ART4EVA is for you!

visit ART4EVA     or           sign up now and get started

MEMBERSHIP IS FREE

23 February 2011

Watercolour Heliconia

This beautiful exotic flower is in a part of my garden where it is rarely seen. I just couldn't bring myself to pick it so on the weekend I took my easel down to the garden....


03 February 2011

COUNTRY MORNING final step - adding the tail

Finally .....  I decided that, even though it wasn't visible in my original reference photo,  the cows tail should be added to close the composition. Every other photo I had from that morning had the tail hanging straight down so it was not difficult to place it in the picture.

COUNTRY MORNING polish the bucket and add a 3rd hen

I felt the composition could fit in 1 more hen to really set the scene and convey that friendly country atmosphere. The furthermost hen from the reference photo became my foreground lead in character. There was not much detail showing in the reference photo but that was actually ideal for the part I need her to play. Although her head is clearly turned back towards the viewer, I don't feel she is calling attention to herself but almost inviting company.
The bucket also was in need of a polish if it was to appear clean enough to receive milk. A handle and reflections were added.
The shirt extension was softened with a eraser to blur it into the background.
A simple lighting and shadow effect on the ground helps to maintain the central focus.

02 February 2011

COUNTRY MORNING hen detail

Detail was added to the hens. Much of the shadow effect on the white hen was achieved by simply rubbing the white pastel off with my finger to allow the paper colour to show through.
Although the hens are very much in the foreground, and so quite large, their details have been kept fairly vague so as to not draw undue attention. They are not main characters but simply support props to set the scene.

With the addition of the hens I decided that the shirt needed to be extended to the other side of the picture to maintain balance.

COUNTRY MORNING hen reference photo

My reference photo for the hens.

01 February 2011

COUNTRY MORNING blocking in the hens

After reviewing the composition I decided the bottom looked empty. It needed more chooks to set the scene and give that real country atmosphere. I had to be careful though, I didn't want these additions to have too much detail or they would compete with the portrait for attention.
Back in my photo library I found a photo of 3 hens  that was just right for the job.
It took a couple of attempts to get the positioning just right. My first position I decided was too close to the rooster so I erased them and moved them back a pace. ( you will notice the patch of chest missing on the rooster )
That is the beauty of working on quality paper - if you are not happy you can erase and rework at any time.

31 January 2011

COUNTRY MORNING refining the likness

Work continued on the rooster, gradually adding details to the feathers. Attention was also given to refining the likeness of the portrait, bit by bit, making slight adjustments to the main features: the shading on the nose ..... the teeth and corner of the mouth..... corners of the eye....contours of the ear....as well as the positioning of the strongest highlights on the cheek, nose, chin and ear.

COUNTRY MORNING blending rooster adding hair and face details

The rooster colours were finger blended into the paper. More details were gradually added and blended in turn.
Then I returned my attention to the face and hair. Skin tones were built up to form the contours of the face. Highlights were added to the hair to indicated waves and curls.
Details were added to the udder. The back section was kept fairly plain, the closer to the face, the more detail and sharpness.

30 January 2011

COUNTRY MORNING add the rooster

The rooster was added free hand by looking at the reference photo I had made earlier. I measured his overall height and noted a halfway point which was the widest part of his chest. The widest part of his tail was also roughly at this point. With these few measurements, I blocked in his general colours, employing some artistic licence to alter his position a little to suit my needs.

28 January 2011

COUNTRY MORNING adding the bucket

When it came time to add the bucket I decided that I didn't like the look of the green plastic one in the original reference photo so I set about turning it silver. My first step was to edit the reference photo by reducing the colour to black and white adjusting the brightness & contrast. This gave me a pretty good idea of where to put the shading but I needed to see some reflections. I needed a real silver bucket. I borrowed and cleaned my husbands old concreting bucket and had a few more photos taken. Now I had some nice reflections of the handle against the bucket to work with.

26 January 2011

COUNTRY MORNING adding the cow

The cow and  arms are blocked in and then finger blended into the paper, paying attention to the direction of hair growth. At this point I became unhappy with the progress of the portraits likeness. I knew the features were located accurately as they had been measured with the grid but I was not happy with the light and shading contours. These details are equally important to the location of yes, nose and mouth if a true likeness is to be achieved.

Rather than trying to continue to build up layers of pastel, I chose to remove most of the top layers on the face with a dry paintbrush. This left me with an underlying fleshtone on which I could start afresh. I decided to leave the face alone for a bit while I focus on adding in some of the other details of the picture.

25 January 2011

COUNTRY MORNING starting the face

Using a variety of flesh tones the lights and darks  of the face are blocked in. The colours are then blended with fingers working around the contours and features. The eyes and mouth details are added and more flesh colours gradually built up. For the shadows and creases around the eyes,  mouth, ears and jawline an eraser is used gently to reveal undertones of the paper. Next some dark and midtones are blocked in and blended for the hair.

23 January 2011

Country Morning Portrait reference photos

This week we will look at painting a portrait story. The main focus will be on the face with just enough background detail to convey some personality and suggest a bit of a story. Step one is to choose, crop and assemble some  reference photos. Milking time is always a bit of a community event at our place, with the foster calf waiting for her share of the milk and the free range chooks scouting about for dropped any grain. Even though I am working in a wide open space it can feel quite cramped when everyone wants to get in on the action.

06 January 2011

LITTLE ANGEL DAY 2

DAY 2 The background is in place. Some slight adjustments to the face, more prominant lips and more hair definition.

.....Now an after thought.....should the wings be more detailed and brought to the foreground ?

05 January 2011

LITTLE ANGEL PORTRAIT DAY 1

DAY 1 The Portrait stage is complete. Now to work on the background. My inspiration is the extract from one of Raphael's masterpieces.

LITTTLE ANGEL

As I have had so many requests for Portrait lessons I have decided to start the year with a few character studies. These will be portraits with personality.

To kick the series off I have chosen an old photo of my niece Skye. It is not a very good quality photo, just a snapshot taken with my husbands mobile phone, but the pose is too cute to resist. It reminds me so much of the little angels that Raphael painted that I have decided to use it to create my own little angel.

Blog Archive

Hi there

My photo
Gympie, QLD, Australia
I love to paint and draw and I often teach to share my passion with others. Currently I am focussing on producing some step-by-step painting lesson dvds.